
The MHK2 Installation Manual is a comprehensive guide for installing and configuring the Mitsubishi Electric RedLINK Wireless Remote Controller Kit. It emphasizes safety‚ proper installation‚ and provides step-by-step instructions for mounting‚ wiring‚ and linking components. The manual also covers advanced features like scheduling and sensor setup‚ ensuring optimal performance and user convenience.
1.1 Overview of the MHK2 Controller Kit
The MHK2 Controller Kit is part of the Mitsubishi Electric RedLINK Wireless Remote Controller system‚ designed for seamless operation with indoor units. It includes the MRCH2 Controller‚ MIFH2 Receiver‚ and MRC2 Cable Remote‚ offering wireless communication and advanced control features. The kit enables precise temperature management‚ mode adjustments‚ and scheduling capabilities. Its compact design and user-friendly interface make it ideal for modern HVAC systems. The MHK2 supports features like the 3D i-See Sensor for enhanced comfort and energy efficiency. This kit is compatible with various Mitsubishi Electric ducted and cassette systems‚ ensuring versatile installation options. Proper installation and configuration are essential to unlock its full potential and ensure optimal performance.
1.2 Importance of Proper Installation
Proper installation of the MHK2 Controller Kit is crucial to ensure safe and reliable operation. Incorrect installation can lead to electrical hazards‚ system malfunctions‚ or inaccurate sensor readings. The manual strongly advises that only trained and experienced technicians perform the installation to avoid potential risks. Disconnecting power before starting is essential to prevent electrical shock or equipment damage. Proper setup also ensures optimal performance‚ accurate temperature control‚ and efficient energy use. Adhering to the installation guidelines guarantees compliance with safety standards and manufacturer recommendations‚ which are critical for maintaining warranty validity and ensuring the system operates as intended. Improper installation can void warranties and lead to premature system failure‚ emphasizing the need for meticulous adherence to the provided instructions.
1.3 Safety Precautions and Warnings
Before starting the installation‚ it is essential to follow all safety precautions to avoid potential risks. Always disconnect power from the system to prevent electrical shock or equipment damage. The manual strongly recommends that only trained and experienced technicians perform the installation. Improper installation can lead to hazardous conditions‚ including electrical hazards or system malfunctions. Additionally‚ failure to follow safety guidelines may result in voiding the product warranty. Proper handling of electrical components and adherence to safety standards are critical to ensure the system operates safely and efficiently. Ignoring these precautions can lead to serious consequences‚ including injury or equipment damage. Always refer to the manual for specific safety instructions and guidelines.
Pre-Installation Requirements
Ensure all components are included in the package and compatible with Mitsubishi Electric systems. Verify tools and materials are ready‚ and review the manual for specific requirements.
2.1 Tools and Materials Needed
To ensure a smooth installation‚ gather the necessary tools and materials. Required items include a screwdriver‚ drill‚ mounting hardware‚ and power tools for securing components. Additionally‚ ensure the MHK2 Controller Kit components (MRCH2 Controller‚ MIFH2 Receiver‚ and MRC2 Cable Remote) are included. Verify compatibility with Mitsubishi Electric indoor units and check for any additional accessories‚ such as batteries for the remote controller. A Wireless Interface 2 may be needed for advanced features like the Kumo Cloud app. Always disconnect power before starting to avoid electrical hazards. Refer to the manual for specific requirements and ensure all materials are compatible with the system. Proper preparation ensures a safe and efficient installation process.
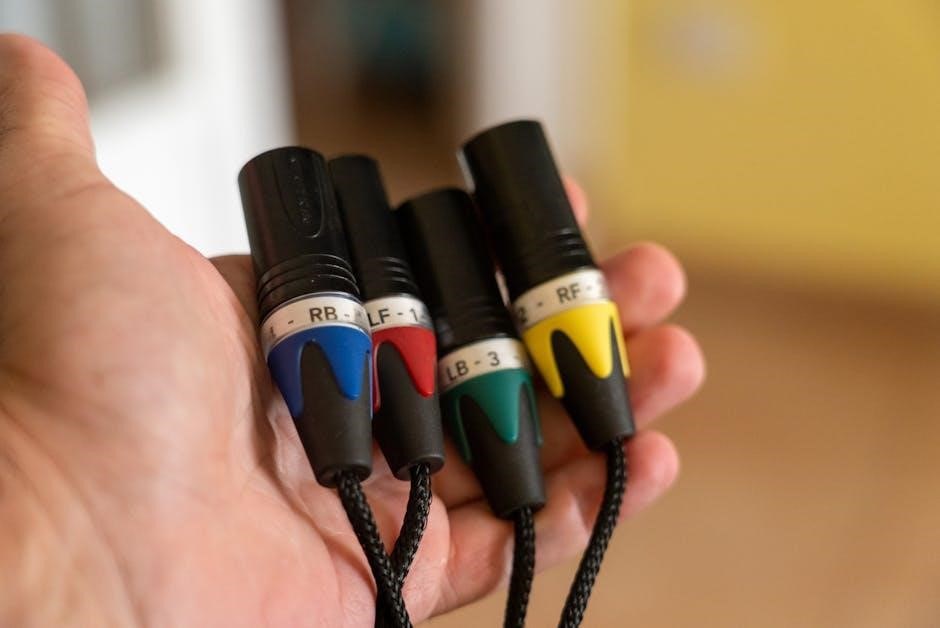
2.2 Understanding the Components
The MHK2 Controller Kit consists of key components designed for seamless operation. The MRCH2 Controller serves as the main interface‚ while the MIFH2 Receiver ensures wireless communication. The MRC2 Cable Remote provides an alternative control method. Additionally‚ the 3D i-See Sensor enhances functionality by detecting room conditions. Each component plays a vital role in the system’s performance. Familiarize yourself with their functions to ensure proper installation and configuration. The MRCH2 Controller must be mounted correctly‚ and the MIFH2 Receiver should be connected to the indoor unit. The MRC2 Cable Remote offers wired control for convenience. Understanding these components ensures compatibility with Mitsubishi Electric indoor units and enables advanced features like scheduling and sensor-driven operation. Proper component identification is crucial for a successful setup;
2.3 Checking the Package Contents
Before starting the installation‚ verify that all components of the MHK2 Controller Kit are included in the package. The kit typically contains the MRCH2 Controller‚ MIFH2 Receiver‚ MRC2 Cable Remote‚ and necessary accessories like batteries‚ mounting hardware‚ and cables. Ensure no items are missing or damaged‚ as this could delay installation. Check for the presence of the 3D i-See Sensor if applicable‚ as it is required for advanced features. Compare the contents with the manual’s packaging list to confirm everything is accounted for. Missing or damaged items should be reported to the supplier immediately to avoid installation issues. Properly verifying the package contents ensures a smooth and successful setup process.

Installation Process
The MHK2 installation involves mounting the controller‚ installing the wireless receiver‚ and connecting components. Ensure power is disconnected to prevent electrical shock or damage. Follow step-by-step instructions carefully.
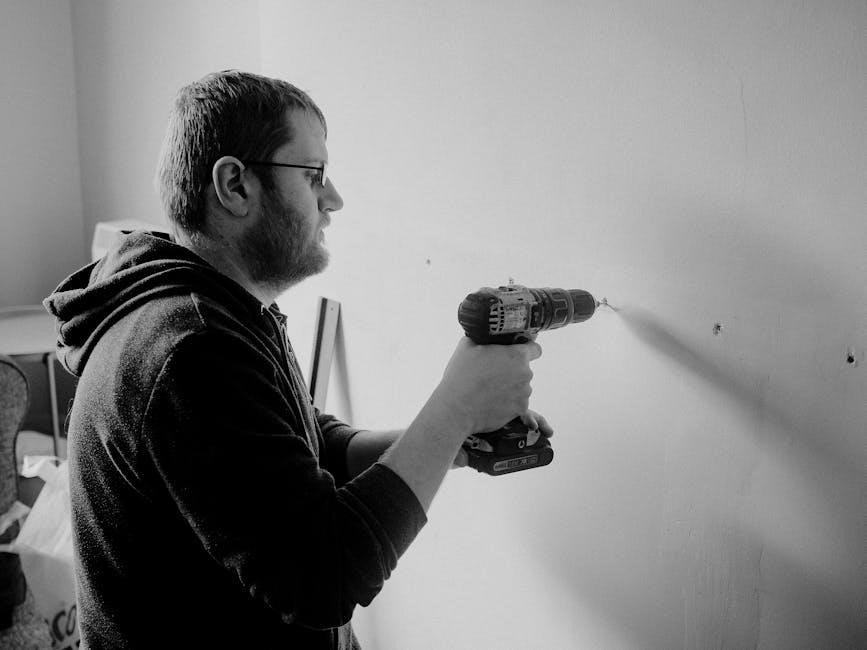
3.1 Mounting the MHK2 Controller
Mounting the MHK2 Controller requires careful preparation. First‚ ensure the wall plate is properly aligned and secured. Gently pull the controller from the wall plate if necessary. Install AA batteries in the remote control before mounting. Align the controller with the wall plate and snap it into place. Ensure the unit is level and firmly attached to avoid loose connections. For models with the 3D i-See Sensor‚ verify the sensor is installed correctly and positioned as per the manual. Double-check all connections and ensure the controller is securely fastened to the wall. Proper mounting ensures reliable operation and prevents potential malfunctions. Follow the manual’s diagrams for precise installation.
3.2 Installing the Wireless Receiver
Installing the wireless receiver requires careful placement and connection. First‚ disconnect power to the system to avoid electrical shock or damage. Mount the receiver near the indoor unit‚ ensuring it is within range of the remote controller. Choose a stable‚ dry location‚ away from direct sunlight and moisture. Connect the receiver to the indoor unit’s control board‚ following the wiring diagram in the manual. Ensure all connections are secure and properly insulated. Once installed‚ pair the receiver with the remote controller by following the linking procedure outlined in the manual. Verify proper communication between components before restoring power. This ensures reliable operation and optimal performance of the MHK2 system.
3.3 Connecting the Cable Remote Controller
Connecting the cable remote controller involves several key steps to ensure proper functionality. First‚ disconnect power to the system to prevent electrical shock or damage. Locate the remote controller port on the indoor unit and connect the cable securely. Use the provided cable or one compatible with the MHK2 system. Follow the wiring diagram in the manual to ensure correct connections. Tighten all screws firmly to secure the cable. Once connected‚ mount the remote controller in a convenient location‚ ensuring the cable is neatly routed and protected from damage. Finally‚ restore power and test the remote controller to confirm it communicates properly with the system. This ensures reliable operation and user convenience. Always refer to the manual for specific wiring instructions and diagrams.
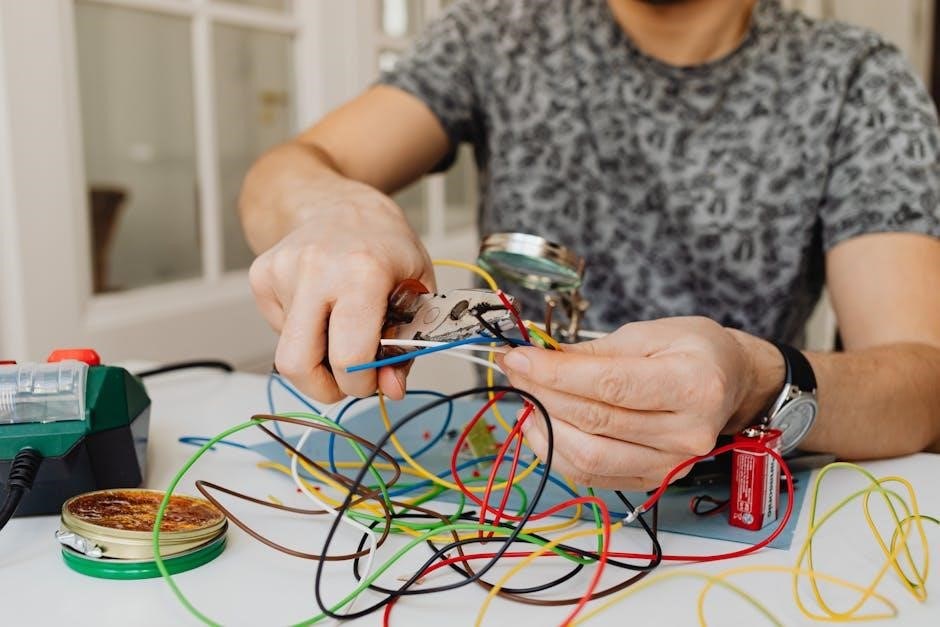
3.4 Wiring and Electrical Connections
Wiring and electrical connections are critical for the proper functioning of the MHK2 system. Always disconnect power before starting to avoid electrical shock or damage. Use the provided wiring diagram to identify and connect the correct terminals on the controller‚ receiver‚ and indoor unit. Ensure all connections are secure and tightly screwed to prevent loose contacts. Use compatible cables and tools to maintain system integrity. Double-check the wiring for accuracy before restoring power. Once connected‚ test the system to ensure all components communicate and function correctly. Proper wiring ensures reliable operation‚ energy efficiency‚ and safety. Refer to the manual for specific instructions and safety guidelines to avoid potential hazards.
Initial Setup and Configuration
The initial setup involves powering on the system‚ linking the remote controller to the receiver‚ and configuring basic settings. This ensures proper communication and functionality.
4.1 Powering On the System
After completing the installation‚ power on the MHK2 system by connecting the power source to the indoor unit. Ensure all electrical connections are secure and correct. Insert the batteries into the remote controller‚ following the polarity instructions. Once powered on‚ the controller will initialize and display the home screen; Verify that all components communicate properly by checking the LED indicators on the receiver and controller. If the system does not power on‚ refer to the troubleshooting section for potential issues. Always ensure the power is disconnected before performing any maintenance or repairs to avoid electrical shock or damage. Proper power-up ensures smooth operation and functionality of the MHK2 system.
4.2 Linking the Remote Controller to the Receiver
To establish communication between the MHK2 remote controller and the receiver‚ ensure both devices are powered on. Press and hold the “LINK” button on the receiver for 3-5 seconds until the LED blinks. Within 30 seconds‚ press and hold the “LINK” button on the remote controller until it beeps. The LED on the receiver will stop blinking once the link is successful. If the linking fails‚ restart the process or check for interference from other devices. Ensure the remote controller batteries are properly installed. A successful link is confirmed by the remote controller displaying the current settings. This step is crucial for proper system operation and must be performed during initial setup or after resetting the system. Always follow the sequence carefully to avoid connection issues.
4.3 Configuring Basic Settings
After linking the remote controller to the receiver‚ configure the basic settings to tailor the system to your preferences. Set the temperature range‚ operation mode (Heat‚ Cool‚ or Auto)‚ and fan speed. Use the remote controller to navigate through the menu options. Select the desired mode and adjust settings using the arrow buttons. For scheduling‚ set the time and desired temperature for different periods. Ensure the 3D i-See Sensor is enabled if installed‚ to allow automatic adjustments based on room conditions. Save your settings to ensure they remain active. Refer to the manual for additional options‚ such as energy-saving modes or silent operation. Proper configuration ensures efficient and comfortable system performance‚ tailored to your specific needs.
Advanced Features and Settings
The MHK2 offers advanced features like scheduling‚ temperature modes‚ and the 3D i-See Sensor for enhanced comfort and energy efficiency. These settings optimize performance and user experience.

5.1 Scheduling and Timer Functions
The MHK2 allows users to set custom schedules and timer functions for optimal temperature control. By programming specific times‚ you can automate heating and cooling adjustments‚ enhancing energy efficiency. The system supports multiple daily schedules‚ enabling tailored comfort throughout the day. Timer functions can be easily configured via the remote controller or through the Kumo Cloud app‚ offering flexibility and convenience. These features ensure your system operates efficiently‚ reducing energy consumption while maintaining desired temperatures. Proper setup of these functions is detailed in the manual‚ guiding users through each step to maximize performance and comfort.
5.2 Temperature and Mode Settings
The MHK2 controller offers precise temperature and mode settings to customize your comfort. Users can adjust temperature ranges and select modes such as Heat‚ Cool‚ or Auto‚ ensuring optimal climate control. The system also features advanced settings like temperature swing control‚ minimizing fluctuations for consistent comfort. Additionally‚ the 3D i-See Sensor enables smart temperature distribution‚ adapting to room conditions. The manual provides detailed instructions for configuring these settings‚ allowing users to tailor the system to their preferences. Proper setup ensures energy efficiency and maintains desired indoor temperatures‚ enhancing overall performance and user satisfaction.
5.3 Using the 3D i-See Sensor
The 3D i-See Sensor is an advanced feature of the MHK2 system‚ designed to optimize heating and cooling by detecting human presence and movement. It scans the room to identify hot and cold spots‚ ensuring even temperature distribution. The sensor’s wide-angle detection capability allows it to monitor multiple areas simultaneously‚ adapting the system’s output for maximum comfort. For accurate operation‚ the sensor must be installed correctly‚ and its position should not be obstructed. The manual provides detailed instructions for configuring the sensor’s settings and troubleshooting common issues. Proper use of the 3D i-See Sensor enhances energy efficiency and system performance‚ ensuring a comfortable indoor environment tailored to user needs.
Troubleshooting Common Issues
This section addresses common problems like no power‚ display issues‚ or communication errors. It provides solutions for sensor malfunctions and inaccurate readings‚ ensuring system functionality and efficiency.
6.1 No Power or Display Issues
If the MHK2 controller has no power or the display is not functioning‚ first ensure the power source is connected properly. Check if batteries are installed correctly or if the wiring is loose. Verify that the circuit breaker or fuse has not tripped. If using batteries‚ replace them with fresh ones and ensure they are inserted correctly. Restart the system after checking all connections. If the issue persists‚ reset the controller by disconnecting and reconnecting the power supply. Consult the manual for specific reset procedures. Ensure no obstructions block the display and that the controller is mounted correctly. If problems remain‚ contact Mitsubishi Electric support for further assistance.
6.2 Communication Problems Between Components
Communication issues between the MHK2 controller‚ receiver‚ and sensors can occur due to incorrect linking or wireless interference. Ensure all components are properly paired during the initial setup. Restart the system and re-link the remote controller to the receiver following the manual’s instructions. Check for physical obstructions or distance between components that may weaken the wireless signal. Verify that no other devices are interfering with the same frequency band. If issues persist‚ reset the system by disconnecting power for 30 seconds and reconnecting. Consult the manual for specific reset procedures. If problems remain unresolved‚ contact Mitsubishi Electric support for further troubleshooting or potential firmware updates.
6.3 Sensor Malfunction or Inaccurate Readings
Sensor malfunctions or inaccurate readings can disrupt system performance. Ensure the 3D i-See Sensor is properly installed and calibrated. Clean the sensor regularly to avoid dust or debris interference. Verify that the sensor is positioned correctly‚ as specified in the manual. If issues persist‚ check for firmware updates or recalibrate the sensor following the manual’s instructions. Inaccurate temperature readings may indicate a faulty sensor or incorrect configuration. Consult the troubleshooting section for specific error codes or symptoms. If the problem remains unresolved‚ contact Mitsubishi Electric support for assistance or potential sensor replacement. Always refer to the manual for detailed diagnostic procedures to ensure accurate sensor operation and optimal system functionality.

Maintenance and Upkeep
Regularly clean the controller and sensors to ensure accurate performance. Replace batteries as needed and update software for optimal functionality. Schedule periodic checks to maintain efficiency.
7.1 Cleaning the Controller and Sensors
Regular cleaning of the MHK2 controller and sensors is essential for maintaining accurate performance. Use a soft‚ dry cloth to wipe the controller’s surface‚ avoiding harsh chemicals or liquids. For the 3D i-See Sensor‚ gently remove dust or debris with a dry cloth to ensure precise temperature and mode readings. Avoid touching the sensor lens to prevent smudging. Clean the remote controller’s buttons and screen regularly to maintain responsiveness; Proper maintenance ensures reliable operation and extends the lifespan of the components. Always disconnect power before cleaning to prevent electrical issues. Follow these steps to keep your system functioning optimally and accurately.
7.2 Replacing Batteries
Replacing batteries in the MHK2 controller and remote is straightforward. Use AA alkaline or lithium batteries for optimal performance. To replace the batteries‚ remove the controller from the wall plate and locate the battery compartment. Insert the new batteries ensuring correct polarity‚ as indicated by the symbols inside the compartment. Avoid mixing old and new batteries or using different types. For the 3D i-See Sensor‚ if applicable‚ replace its battery following the same guidelines. After replacing‚ reattach the controller to the wall plate and test functionality. Always use fresh batteries to maintain reliable operation and avoid signal issues. Refer to the manual for specific battery requirements and recommendations to ensure optimal performance and longevity of the system.
7.3 Software Updates and Firmware
Regular software updates and firmware upgrades are essential to ensure the MHK2 controller operates at peak performance. Mitsubishi Electric periodically releases updates to enhance functionality‚ improve compatibility‚ and address potential issues. To update the firmware‚ use the Kumo Cloud app or download the latest version from Mitsubishi Electric’s official website. Follow the manual’s instructions for a seamless update process. Always ensure the system is powered on and connected during updates to prevent interruptions. It is recommended to have a trained technician perform complex updates to avoid errors. Keeping the firmware up-to-date ensures optimal performance‚ security‚ and access to the latest features. Refer to the manual for detailed steps and troubleshooting tips specific to software updates.
After completing the installation‚ verify all components are correctly installed and functioning. Test all features to ensure proper operation and optimal performance. Refer to the manual for final checks and troubleshooting tips to guarantee a smooth system operation.
8.1 Verifying Proper Installation
After completing the installation‚ it is crucial to verify that all components are correctly installed and functioning as intended. Start by ensuring the MHK2 controller is securely mounted and properly connected to the receiver. Check that the power is disconnected before performing any inspections to avoid electrical hazards. Verify that all wires are securely connected and that the remote controller is linked to the receiver. Test the system by turning it on and checking basic functions such as temperature adjustment and mode changes. Ensure the 3D i-See sensor‚ if installed‚ is calibrated and functioning accurately. Review the installation manual for specific verification steps and consult troubleshooting guides if any issues arise during testing.
8.2 Testing All Functions
Once the installation is verified‚ thoroughly test all functions of the MHK2 system to ensure proper operation. Begin by checking basic operations such as cooling‚ heating‚ and fan modes. Test the remote controller’s range and responsiveness‚ ensuring it can control the system from various locations. Verify scheduling and timer functions by setting and confirming programmed operations. Check the 3D i-See sensor’s accuracy in detecting room conditions and adjusting settings accordingly. Test the linking between the remote controller and receiver to ensure seamless communication. Review the installation manual for specific testing procedures and consult the troubleshooting section if any issues arise during testing. This step ensures the system operates efficiently and meets user expectations.
8.3 Ensuring Optimal Performance
To ensure the MHK2 system operates at its best‚ perform regular maintenance and checks. Clean the controller and sensors to prevent dust buildup‚ which can affect performance. Replace batteries in the remote controller as needed to maintain reliable communication. Check for and install any available software updates to keep the system up-to-date with the latest features and improvements. Verify that the 3D i-See sensor is properly aligned and calibrated for accurate readings. Ensure proper ventilation around the indoor unit to maintain efficient operation. Refer to the manual for specific maintenance recommendations and troubleshooting tips. Regularly reviewing and adjusting settings can also help optimize performance and energy efficiency‚ ensuring the system meets your comfort and energy-saving goals effectively.

Additional Resources
Download the full MHK2 Installation Manual as a PDF for detailed instructions. Contact Mitsubishi Electric support for assistance. Explore online tutorials and videos for additional guidance and troubleshooting tips.
9.1 Downloading the Full MHK2 Manual
The MHK2 Installation Manual is available for free download as a PDF file‚ providing comprehensive instructions for installing and configuring the RedLINK Wireless Remote Controller Kit. The manual includes detailed step-by-step guides‚ diagrams‚ and safety precautions to ensure a smooth installation process. It covers topics such as mounting the controller‚ wiring‚ and linking components. The PDF can be downloaded from Mitsubishi Electric’s official website or authorized portals. Ensure the file is genuine by verifying the MD5 checksum. The manual is essential for technicians and users to understand advanced features like scheduling and sensor setup. Use the table of contents to navigate easily through the document.

9.2 Contacting Mitsubishi Electric Support
For assistance with the MHK2 Controller Kit‚ contact Mitsubishi Electric Support through their official website or toll-free number: 800-433-4822. Their support team provides technical guidance‚ troubleshooting‚ and installation help. Visit www.mehvac.com for more resources‚ including FAQs and user manuals. Mitsubishi Electric also offers regional support through authorized distributors and local offices. Ensure to contact certified professionals for complex issues. The company is committed to delivering high-quality customer service and technical expertise to ensure optimal performance of your MHK2 system. Reach out for inquiries‚ repairs‚ or additional support materials to resolve any installation or operational challenges effectively.
9.3 Online Tutorials and Videos
Online tutorials and videos provide visual guidance for installing and using the MHK2 Controller Kit. Mitsubishi Electric offers instructional videos on their official website and YouTube‚ covering topics like thermostat setup‚ scheduling‚ and advanced features. Jared’s installation video demonstrates the MHK2 Wall Thermostat setup‚ while other videos explain how to access the Advanced Menu and configure settings. Additionally‚ the FCCID website hosts user manuals and installation guides in PDF format. These resources are ideal for technicians and homeowners seeking hands-on learning. Visit FCCID or Mitsubishi Electric’s official channels for comprehensive support. These tools ensure a smooth installation and operation experience for the MHK2 system.